A lot of sprite games include tiled backgrounds. Tile Maps are a special tool which allow the creation of these backgrounds without needing large arrays of nodes, which could otherwise potentially cripple your game’s performance. This post will provide a quick overview for tile maps and features including: tile animations, tile variations, 8-Way Adjacency Groups, Custom Adjacency Groups, and a Tile Definition’s User Data.
![]()
Getting Started
You can grab a copy of the project here. I have included both the starter and completed project as well as the assets used in this lesson. The project itself was created using Xcode Version 9.2, by choosing the iOS template “Game” in the Application category. The tile art comes from a collection called “Tiny 16” by Sharm. You can find the original collection here.
Go ahead and download the sample files and extract them somewhere on your computer. To follow along, use the project inside of the “TileMaps_Starter_Template.zip” which is the template created by Xcode, just in case the template changes over time. Next, a little cleanup is in order:
- Open GameScene.swift and clear out the entire body of the class.
- Delete the Action.sks file.
- Open the GameScene.sks file and delete the helloLabel node in the scene.
- Select Assets.xcassets in the Project Navigator. Use the plus button to select the option, New Sprite Atlas.

- Open a Finder window and then drag and drop all of the sprites onto the newly created atlas folder. Alternatively, right click the atlas folder and then choose Import…, select all of the files and import them.

- Delete the empty “Sprite” place-holder that was created initially inside of the atlas.
You should be able to build and run the project at this point. You will only see a black screen, with a node count and frame rate label, but at least you can confirm that there are no problems.
Grid Tile Set
Before we get started with the Tile Map Node, we need to create a Tile Set which will be used to “paint” with. This file is much more powerful than just holding the sprite references themselves, as the tile groups and definitions can be configured with special data and display rules.
- From the menu, choose “File -> New -> File…” or use the keyboard shortcut ‘⌘N’
- Select the “SpriteKit Tile Set” entry from the “Resource” group and then click “Next”.
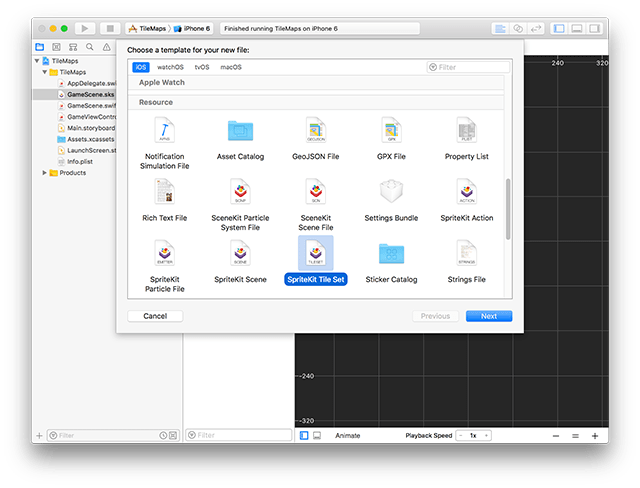
- Leave the “Tile Set Template” at the default selection, “Grid Tile Set”, and click “Next” again.
- Provide a name and location to save the file. I called mine “WorldTileSet” and left it in the root of the project. Click “Create” to finish the wizard.
- After several seconds the file will be generated. Click the plus button and choose “New Grid Tile Set”.

- Double click the new entry so that you can name it. I called mine, “Background”.
- With the “Background” tileset selected, use the plus button again to create a “New Single Tile Group”. This group will be nested inside the tile set. Expand the arrow so that you can see it if necessary.
- Double click the new group and rename it to “Water”.
- Using the “Media Library”, drag and drop the “Water_01” sprite onto the tile’s slot in the center of the screen.

- Try to repeat steps 7-9, but create a “Grass” group using the “Grass_Center_01” sprite.
- With this, we have enough to experiment with painting on a tile map. Go ahead and delete the “Sample Grid Tile Set” that was automatically created for us, as we wont be needing it.
- Select the Assets.xcassets file, and also delete the “Grid Tile Sprite Atlas” entry that was created as part of the Tile Set template.
Tile Map Node
Having created a “Tile Set”, and a couple of “Tile Groups”, we have enough to get started with the “Tile Map Node” itself. Go ahead and select the “GameScene.sks” file so that it appears in the Editor window. From the “Object library”, drag a “Tile Map Node” onto the scene, and use the “Attributes Inspector” to configure it:
- Position: 0, 0
- Map Size: 24, 24
- Tile Size: 32, 32
- Tile Sets: Background
Make sure the “Tile Map Node” is selected and then use the menu bar to choose, “Editor -> Edit Tile Map”. You should see the display of the node change, showing the grid lines so each tile boundary is easier to determine. In addition, a toolbar should have appeared along the top with several buttons, most of which should be familiar to anyone who has used any sort of image editing program. You can use the hand tool to pan around the view without painting, or switch to the brush mode to apply the selected tile to the map wherever you left-click and drag your mouse. You can change the selected tile, use the eye dropper to sample other painted tiles, erase tiles, and even make stamps from groups of painted tiles. Experiment for awhile to get the hang of it all, and then click “Done” when you are ready.

Feel free to build and run the project if you wish. Once the scene is running, our handy debug labels will indicate that there have only been two nodes created. Had you tried to create something like this manually with your own sprite tiles, you would have needed to create 576 nodes (24 columns x 24 rows) instead of just one Tile Map Node! You can make even larger tile maps of course, but don’t go too crazy – a 4096 x 4096 will really slow things down. I tried it, and my MacBook Pro seemed to be stuck with an endless spinner – it might work if I waited long enough, but that is a lot of data even for a specialized node like this to handle. If your end goal is to recreate something like Minecraft or Terraria you might be better off with a custom solution.
Tile Animation
Our water looks pretty good already, but you might be surprised how easy it is to make it even better. We can make the water display as a sprite-sequence that plays as a looping animation. This way our water can look like it has rippling waves. To try out this feature, select our “WorldTileSet” Tile Set asset in the project. Now select the Tile slot in the “Tile Group Overview” pane to reveal its definitions beneath it. Alternatively, expand the arrow next the “Water” group and select the “Tile” entry nested within it. Drill down once more to select the “Water_01” tile definition. In the box labeled “Textures” you will see the first sprite we had added. Now drag and drop the other two Water textures into this list beneath the first texture. Click the “+” button on the “Time Per Frame” control to boost the time to “0.2”. You should already notice the sequence begins playing in the editor’s preview.

Build and run again, and this time all of the water tiles will be animated – no code changes required, and you didn’t even have to update the scene or the tile map node. Beacuse it was using the tile definition here, all of the changes propogate accordingly. As a quick note, if you don’t like the “popping” of the image sequence, you can always add additional frames, or re-use old frames. For example, you could play frames in the order: 1, 2, 3, 2 so that it would loop with a softer ping-pong effect.
Tile Variations
Our grass isn’t quite as nice as the water, having only a single solid color. We can improve it by showing a few variations. Note that we can still paint with it as a single tile “brush”, and will be able to have the editor place our variants using random values according to weights that we can specify. Select the “WorldTileSet” Tile Set asset in the project. Just like before, drill down to the Tile Definition and then look in the center area. Underneath where it says “Tile Group Overview” will be a slot for “Add New Variant”. Drag and drop the other grass tiles here to add them. Select the first tile variant (Grass_Center_01) and set the “Placement Weight” to ‘3’ in the “Attributes Inspector”. Give the second variant a weight of ‘2’ and the third variant a weight of ‘1’. This will make the busiest tiles appear less frequently.

If you want even more variation without needing to create more sprites, you can add another copy of an existing sprite and choose to rotate or flip the variant using the settings in the “Attributes Inspector”. The new rotated or flipped entry is treated just like any other variant and can be given its own placement weight as well.
Unlike with the water update, we wont see the grass variants magically apply if we were to build and run our scene right now. This is actually a good thing, because we wouldn’t want the tiles updating all the time. We might even need to fine-tune the placement of the variants for the best visual effect. Once a variant has been applied, that variant’s tile definition will remain applied until you take an action to change it.
Open up the “GameScene.sks” file, then select the Tile Map Node and enter its Edit mode. Select the “Grass” group as the currently selected tile. Make sure that “Enable Automapping” is turned on in the “Attributes inspector” then paint on your map once again. Feel free to use a flood fill, or the randomize tool to see the effect more quickly. If you disable the “Enable Automapping” feature, then you will be able to select each variant specifically and paint with it as if it were its own tile group entry.

8-Way Adjacency Group
One of the next improvements you might start wishing for would be some sort of transition between tile types. Initially you might think it is easy enough to just add additional “Single Tile Group” entries and manually place them as you need them. While you could do this, it would get very tedious and would probably kill any inspiration you had going for you. There is a better way. Just like we let the Xcode editor paint weighted random tile variations for us, we can also make it magically paint the connecting edge tiles for us, and update neighbor tiles as needed to make sure that everything always looks correct as we paint.
Select the “WorldTileSet” Tile Set asset in the project. Using the “+” button select “New 8-Way Adjacency Group”. Rename the new group “Grass_Edge”. This group has a special collection of tile slots. Each slot is named accordingly and has a sort of shaded region indicating the kind of tile content that should appear there.

Using the “Media Library”, drag and drop the appropriate grass sprites onto each tile slot. I have used similar naming to make this process easier, for example the “Upper Left Edge” slot should be filled with the “Grass_Upper_Left_Edge” sprite. If you accidentally drag the wrong sprite onto a tile slot, just drag the correct sprite on top and choose the option “Replace tile variant texture”. Just like before you can select any of the tile slots and add variants or animation if desired. In our case, we want to add the same variants and weighting to the “Center” slot that we had done with the first “Grass” group.

In this example, my grass edge tiles have transparent areas. This allows me to lay them over any other sprite to see a transition without having had to create a custom image for every possible transition and edge combination. Imagine how tedious it would be to create the transitions just from grass to water without layering – it would actually require 36 new images because of the combination of 12 edge types and the water’s 3 frames of animation.
Open the “GameScene.sks” file. Select our first Tile Map Node and fill it completely with water tiles. Now create a second Tile Map Node with all of the same settings that sits on top of the water. Select the new “Grass_Edge” group and begin painting. The moment you click your mouse, 9 tiles will have been painted forming a little island. As you continue to paint, the tiles will update according to their surrounding grass configurations so that the proper edge tile is always presented.

Custom Group
If you’re like me you probably got really excited by the 8-Way Adjacency Group and thought that it would work for anything. So after setting up some basic terrain you go and attempt to place some walls. Uh oh. You probably didn’t want the wall to have to be a minimum of two tiles thick. There needs to be a way to paint single-width tile lines with corners, and intersections, but also if desired to have whole filled regions just like before. There is – but it requires a bit more setup.
Select the “WorldTileSet” Tile Set asset in the project. Using the “+” button select “New Custom Group”. Rename the new group “Wall”.

This tile group template includes all of the same tile slots as before, including the same naming. In addition, you can select any of the tile slots and see some additional parameters in the Attributes Inspector. For example, if you select the “Center” tile slot, you will see that all of the “Tile Adjacency” checkboxes are selected. Try another, like “Lower Left Edge” and only three of the checkboxes are selected. The various combinations of checkboxes are rules that determine the placement of that particular tile variation. In other words, when you paint a tile, the editor will examine the surrounding tiles and pick the variant that matches. If none of the variants match, the editor will place additional tiles as needed. This is why you paint 9-tiles with the first click of an 8-way adjacency group – there is no slot entry that doesn’t touch other tiles, so the editor paints the surrounding tiles automatically.
With our custom group, we are not required to use the slots or rules that were provided for us. You can add and remove new variants, name them however you wish, and specify rules that make sense to your particular need. Let’s start from scratch by erasing all of the initially provided tile slots – just select them one at a time and hit delete. To create a new tile slot rule, drag a sprite from the Media Library on to the “Add New Rule” placeholder. I will show the naming convention such as “Right Cap”, and you should use the equivalent sprite like “Stone_Wall_Right_Cap”. Following a semi-colon I will list the comma separated Tile Adjacency check boxes that should be enabled.
| Slot Name | Adjacency |
|---|---|
| Center Cap | None |
| Left Cap | Right |
| Horizontal | Right, Left |
| Right Cap | Left |
| Up Cap | Below |
| Vertical | Above, Below |
| Down Cap | Above |
Next, I will recreate several of the tile slots you would normally see in an 8-Way Adjacency Group. However, when I configure the rules, I will not set any of the diagonal constraints.
| Slot Name | Adjacency |
|---|---|
| Upper Left Edge | Right, Below |
| Up Edge | Right, Below, Left |
| Upper Right Edge | Below, Left |
| Left Edge | Above, Right, Below |
| Center | Above, Right, Below, Left |
| Right Edge | Above, Below, Left |
| Lower Left Edge | Above, Right |
| Down Edge | Above, Right, Left |
| Lower Right Edge | Above, Left |
Once you’ve added all 16 tile slots you should see something like this:

Head back to “GameScene.sks” to try it all out. If you try to paint on the same layer as the Land tiles, you will cut holes all around the location you are painting in. You could try disabling the “Enable Automapping” feature and you would be able to get all of the tiles on a single node, but it’s much more difficult to work with. So I suggest creating another “layer” by adding a new Tile Map Node that sits above the other two. Make sure “Enable Automapping” is enabled and try painting. You should have an experience similar to the 8-Way Adjacency group such that the editor automatically populates the correct cap, edge and center tiles as needed, although this version will only add tiles where you have directly painted.

User Data
Now that you can easily paint a variety of complex tile maps, you might be wondering how to start interacting with it. Perhaps you want to apply movement penalties or play different walk sound effects depending on the type of terrain a unit traverses. Or maybe you would like the tilemap to drive your navigation graph so that a unit can know how to reach one location from another while making sure the two always remain in sync.
Much like with any node, a Tile Definition can hold User Data which is a dictionary that can hold Integer, Float, Boolean and String datatypes which you can specify within the editor. To configure something like this, select the “WorldTileSet” file and drill down in any of our tile groups to the bottom – select a Tile Definition. The “User Data” can be setup in the “Attributes Inspector” for any Tile Definition. Note that the values you enter here will apply to EVERY tile on the tile map that references this Tile Definition. That makes it perfect for general use information such as determining whether or not you should be able to walk on a given type of tile, but is not good for “specific” uses like saying that a grass tile along the edge of a map will hold the exit/target information to another scene to load. If you need something unique, then you should add additional nodes to the scene for that purpose.
Given a tile map node named “map”, it is easy to determine the column and row index at any given “location”, such as the position of your player sprite or the touch location of a screen tap. You can then obtain the “Tile Definition” at a specified column and row. Finally, attempt to get a keyed value from the tile’s user data. In this example code snippet, I am looking for a Bool value keyed by the name “block”:
[csharp]
let x = map.tileColumnIndex(fromPosition: location)
let y = map.tileRowIndex(fromPosition: location)
let tile = map.tileDefinition(atColumn: x, row: y)
let block = tile.userData?[“block”] as? Bool
// TODO: logic based on knowing that this tile is a blocked location
[/csharp]
Summary
SpriteKit has provided a lot of great features for us to experiment with. Tile Map Nodes in particular have a large variety of flexible features and it can be very simple to get up and running with new prototype content. In this lesson we covered more than enough of its features to get up and running and to be able to make a large variety of tiled content. You should understand how to make Tile Sets to paint with, how to make some tiles animated, how to paint with variations of tile types, how to automatically paint transitions, and how to make custom groups for your own painting rules and requirements. Finally I also discussed how to interact with tile maps, such as determining what kind of tile occurs at a particular location, and how to use that tile’s user data.
Hi and thanks.
Just curious as to how the sprite sheet was separated into individual sprites. Did you use Photoshop or or some other tool? Must have been time consuming. It would be nice if Xcode auto-separated the sheet when dragged into an atlas but I’ve never seen that!
I have used photoshop in the past, and you’re right, it is time consuming. I have also generated a variety of tools in the past, such as my Unity Tile Mapper that might be worth your while to use.
I think this might be useful for others coming and learning.
Rob may be asking the question because when you downloaded the Tiny16, the tiles were laid out on a single PNG file rather than separately for each Sprite. Perhaps the zip has changed since this was first written, since this great tutorial doesn’t mention any need to cut them out to spec.
Yes, if you don’t pull the image assets from the project, you do need to cut and name them all yourself. I imagine cutting them is probably easiest with the tool that Admin mentioned or with a slicing tool in a graphics program.
Thank you!
Thank you for this. I have been trying to learn how to do TileMaps in Xcode. Every tutorial I find shows very similar things on how to build your entire map. Very cool feature. However, I cannot find anywhere how to MOVE the map. So if my map is 300×300 but my iPhone only shows a 10×20 rectangle (just an example) how do I get the map to move on the screen?
An “SKTileMapNode” inherits from “SKNode”, just like “SKSpriteNode” does. You can move it using all of the same options as are available for any of your other sprites. For example, use a “move to” action:
https://developer.apple.com/documentation/spritekit/skaction/1417768-move
In a lot of scenarios though, you may prefer to move the camera, rather than the tile map. See “SKCameraNode” for more on that.
Great, thanks!